


![CONNECT ART ISSUE 2024 SUBMISSIONS [CLOSED]](https://connect.ajet.net/wp-content/uploads/2024/04/ARTISSUE-INSTA-600x500.png)

This article originally featured in the October 2020 issue of Connect.
Clare Braganza (Fukushima)
Cover Photo: Lisa Fotios
Modern life and the demands of work are hard enough without having to prepare three meals a day. Doing all the proper ‘adulting’ is even harder if you’re a foreigner living in Japan, where the supermarket shelves are full of strange items and the average kitchen is smaller than its Western counterpart. Fortunately, some members of the international community have shared their go-to weeknight recipes and tips with us. And don’t let that tiny fridge stop you from trying them out!
Emma’s Harissa Pasta
Emma Harding (Tokyo)
Photos: Emma Harding
Serves 2-4 (I like to cook a batch and take it into work for lunch)
Ingredients*
2 chicken breasts
2 tsp harissa paste—if you can’t get hold of this, you can use
1tsp of chilli powder, 1tsp of paprika, a clove of garlic (I crush mine) and
some salt and pepper
1 tub of cream
1 pack of cherry tomatoes
1 bag of spinach—the frozen stuff at 7/11 works fine!
1 pinch of chilli flakes (skip this if you don’t like any spice)
Some oil for cooking
Your choice of pasta—we usually have it with penne or fusilli.
Sour cream—if you go for the slightly spicy version, I enjoy
a dollop of sour cream on top of mine.
Method
1) Put your pasta in some boiling water
with a little salt. This can cook while you’re
preparing the rest of the dish.
2) Chop your chicken into strips and your cherry tomatoes
in half.
3) With a large frying pan on medium heat, fry the chicken in
a pinch of chilli flakes, salt and pepper. If you don’t like
spice, leave the chilli flakes out.
4) Once the chicken is cooked, add all of the tomato halves and cook until soft (but they should maintain their shape).
5) Add two teaspoons of harissa paste (or the alternative spice mix) to the pan and
stir, ensuring the tomatoes and chicken are well coated.
6) Add the spinach and cook until wilted.
7) Take off the heat, add the cream, stir to mix all of the delicious ingredients together
and return to the stove. Allow the mixture to bubble away until thick and creamy.
8) Add the pasta to the chicken and tomato (a little pasta water will thicken it up) and
some parmesan if you’ve got it. The amount of parmesan really depends on your
tastes—I like mine super cheesy so tend to throw in a generous handful!
9) Serve (with cheese and/or sour cream if you like).
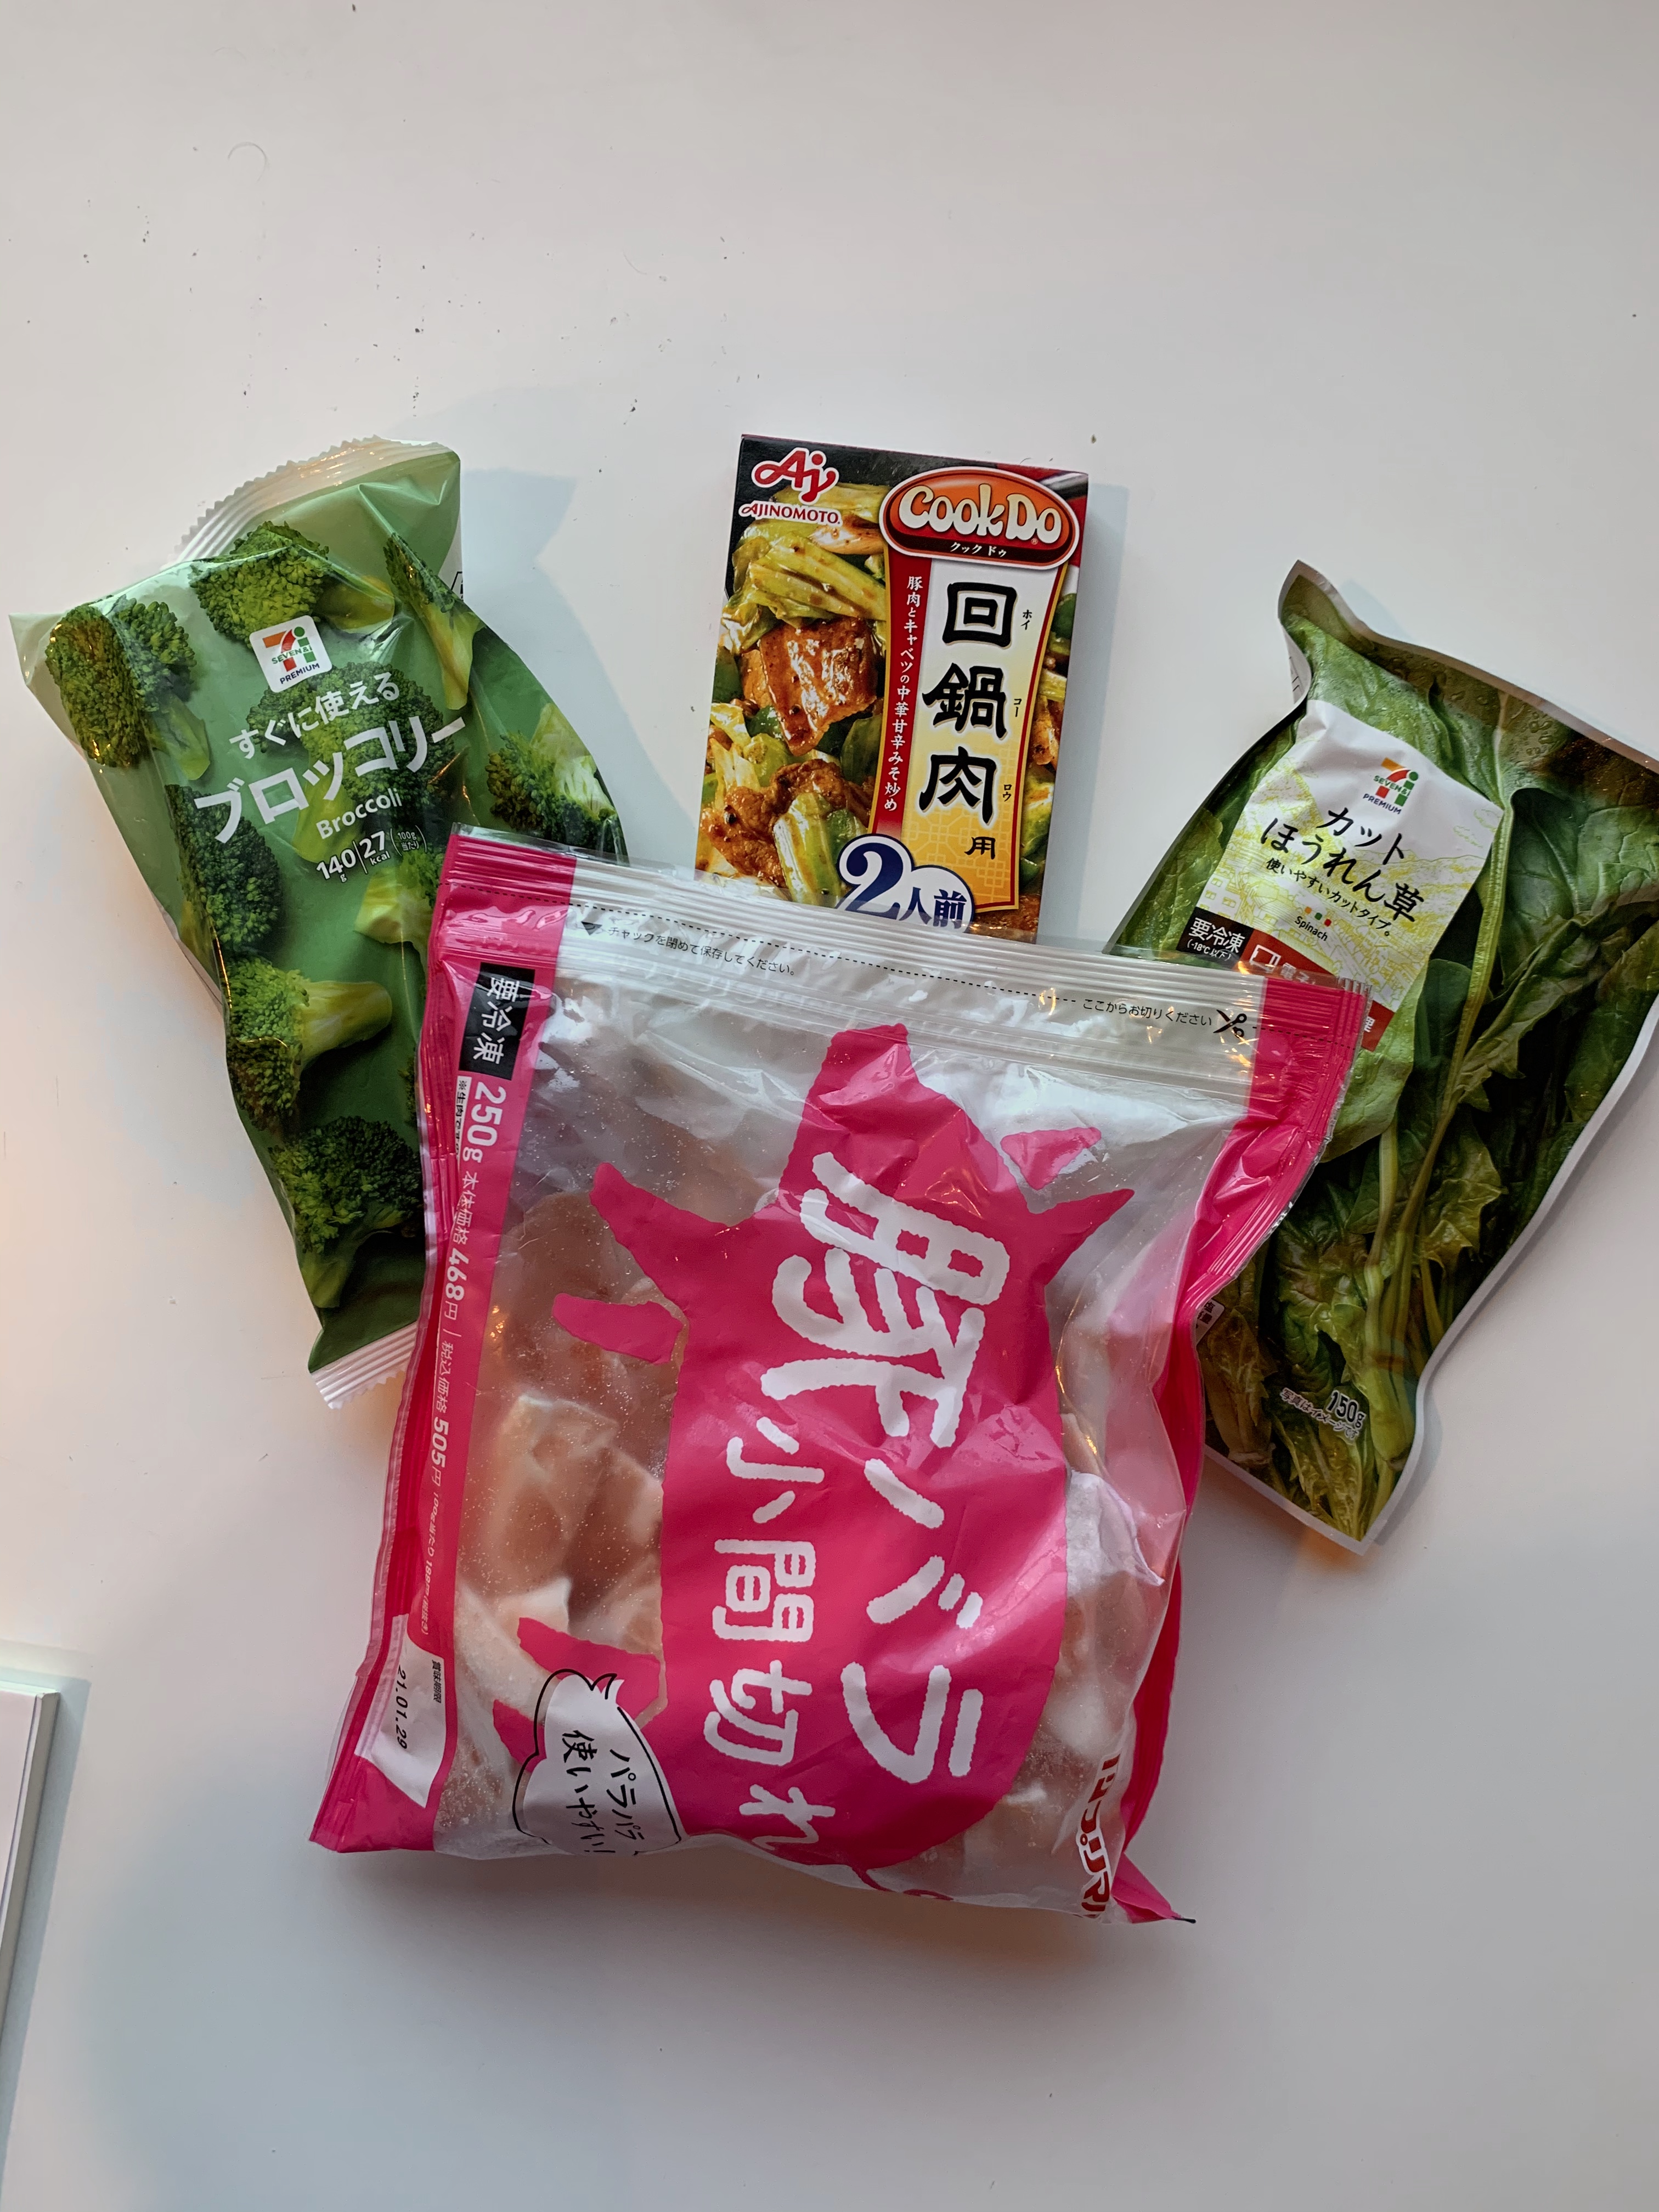
Emma’s Lazy 7/ 11 Pork
Emma Harding (Tokyo)
Photos: Emma Harding
Serves 2
Ingredients
1 pack of the 7/11 “sweet pork” sauce
1/2 bag of sliced pork/200 g fresh pork—it’s more convenient for me personally to buy the frozen bag of pork in 7/11, which works just as well as fresh sliced pork and covers four servings per bag, but use whichever you prefer. If you’re using the frozen bag, half the bag will cover 2 servings.
1/2 bag of spinach (7/11 frozen stuff works fine)
1/2 bag of broccoli (7/11 frozen stuff works fine)
Bowl of rice—I just use white rice and pop it in the rice cooker 20 minutes ahead of time.
 |
 |
 |
|---|
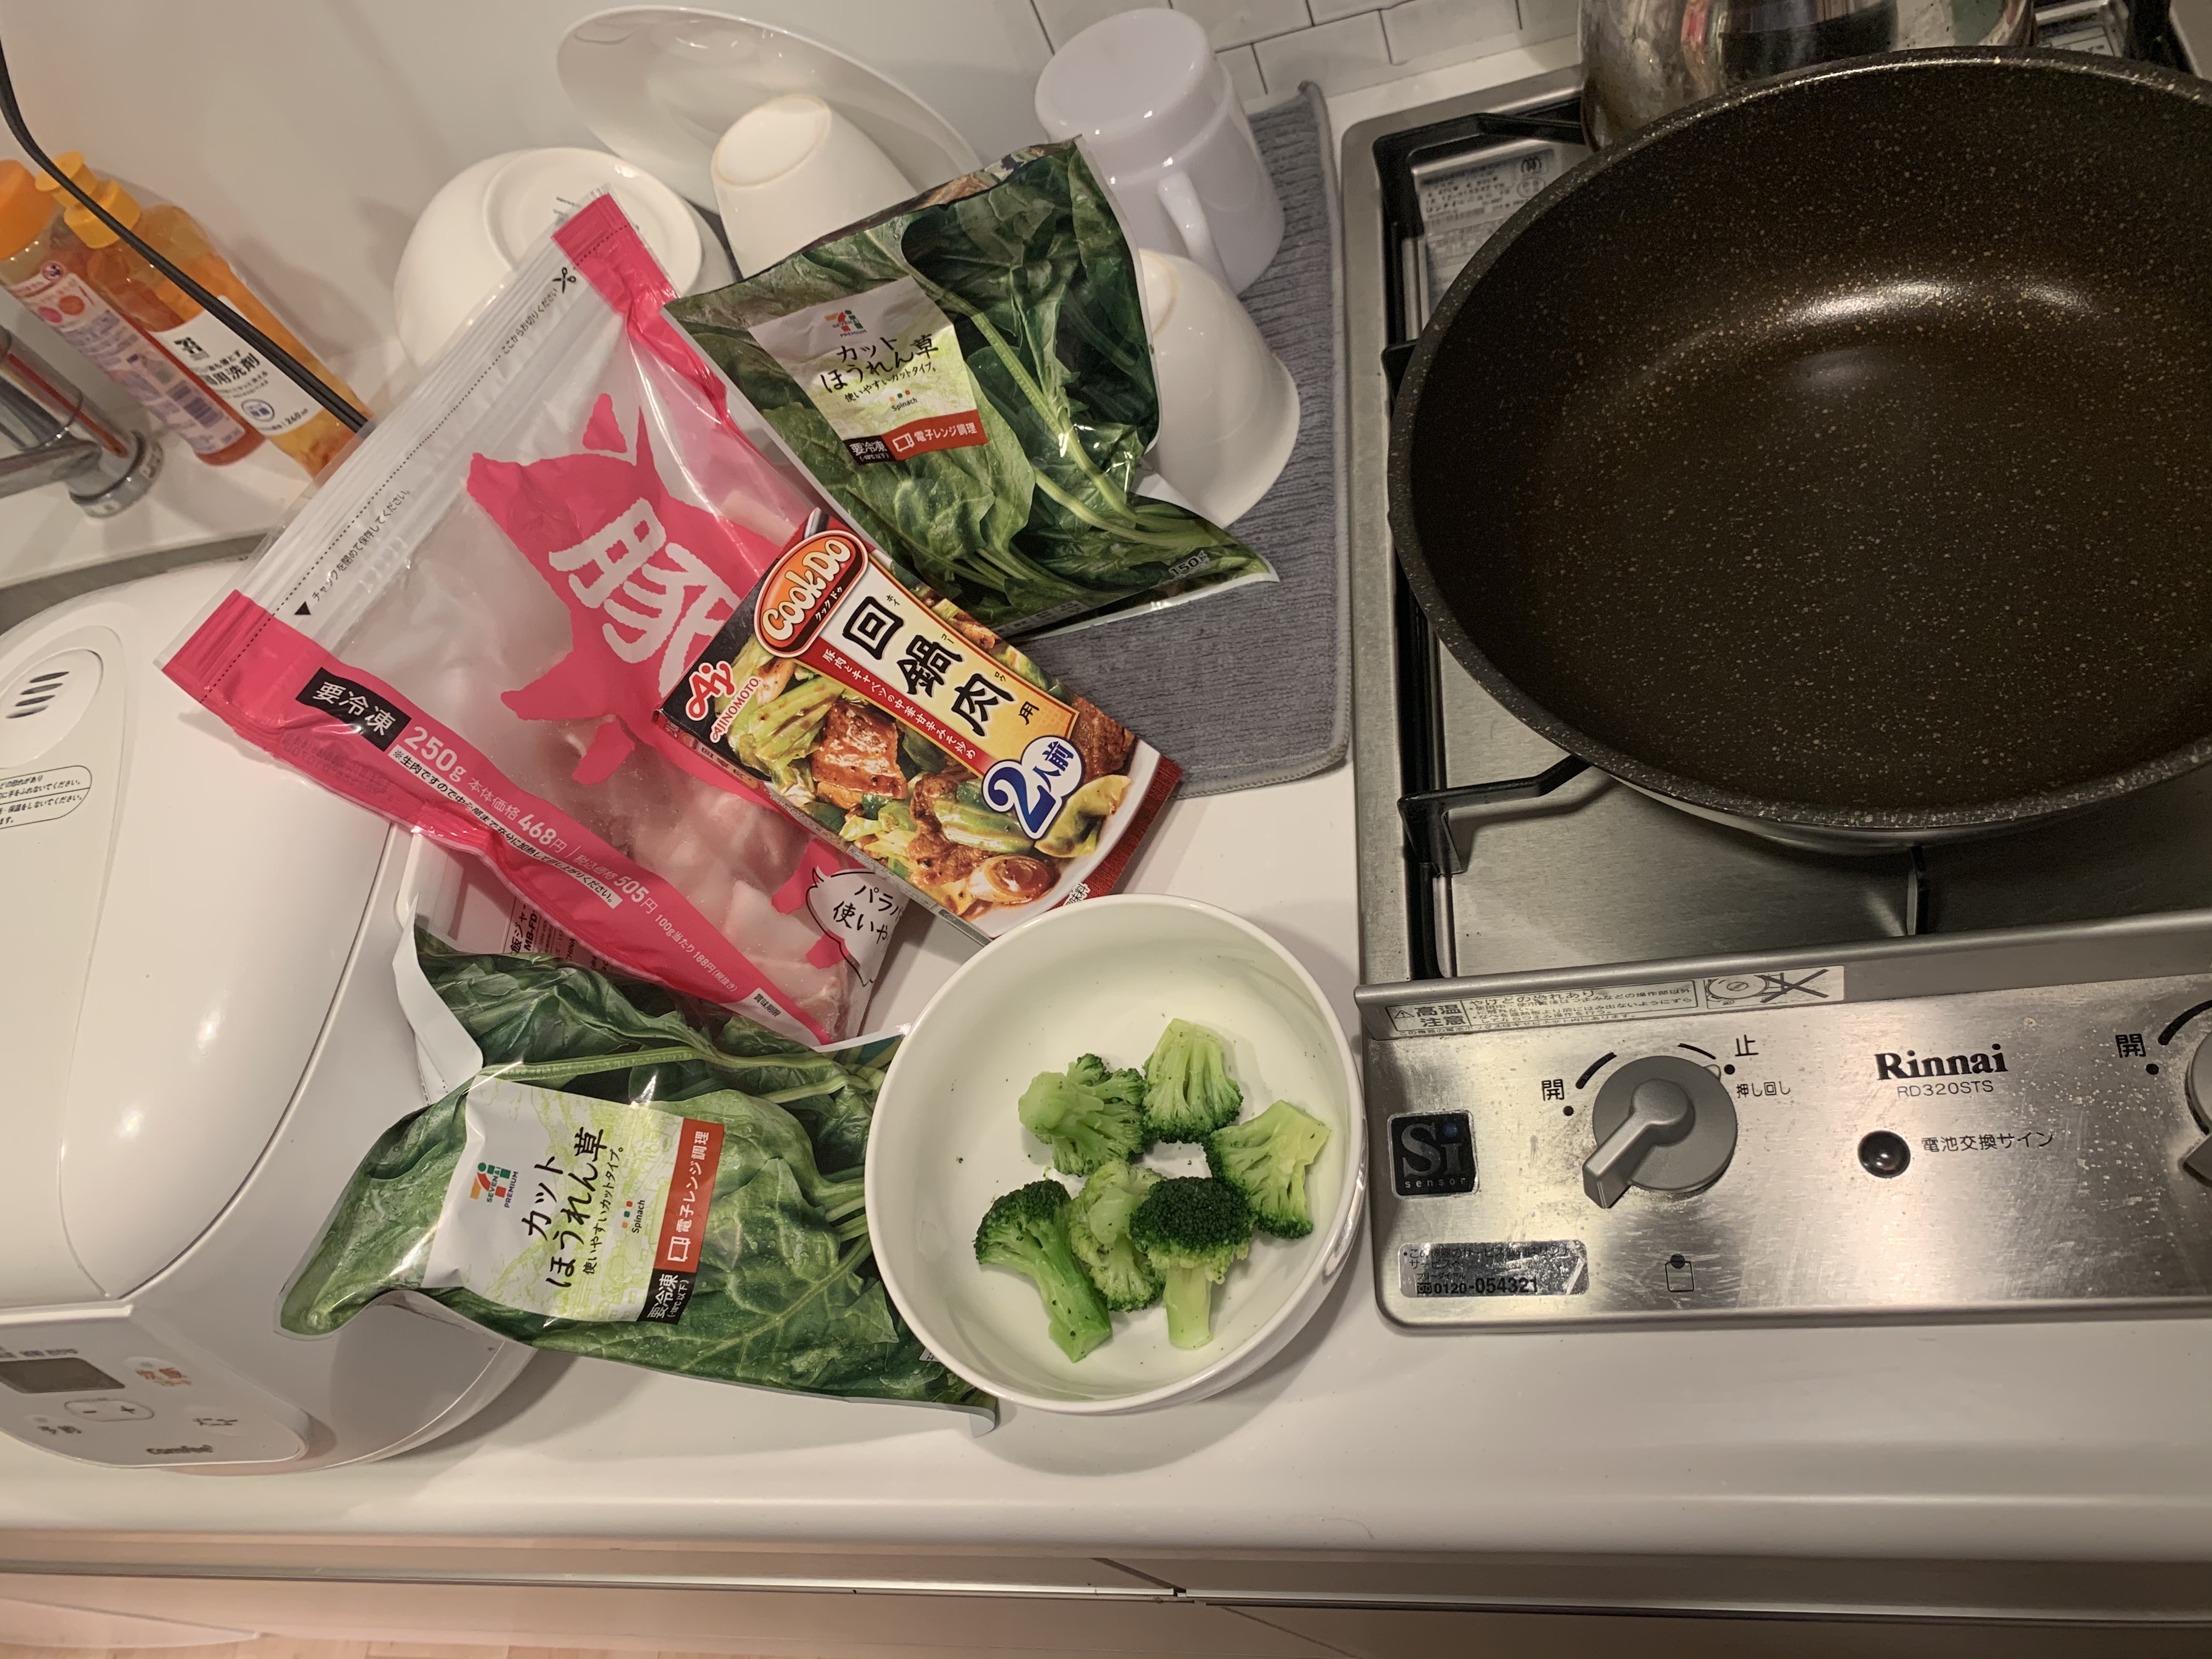
Method
1) Cook your broccoli in advance and
wash the spinach (unless using frozen
products, in which case skip this step).
2) Microwave (if frozen) the broccoli according to the instructions
on the pack to ensure it is defrosted thoroughly.
3) Begin by cooking the pork all the way through on a medium heat—if you’re using frozen, no oil is necessary here as the pork should contain enough moisture to prevent sticking to your pan. If you’re using fresh
pork, then I recommend a really tiny amount
of oil just to prevent sticking, otherwise you’ll end up with a very greasy dish!
4) Add the entire packet of sauce, the broccoli and the spinach to the pork. Mix together well and turn the heat down to low.
5) Once totally combined and all the ingredients are cooked through, serve with rice.
Enjoy! It’s as simple as that and I really love how tasty this dish is. It’s also very cheap—probably no more than 200-300 yen a serving.
Emma is currently a second-year JET working at a senior high school in downtown Tokyo. When she isn’t teaching, Emma enjoys blogging at Emma-Loves.com, photography, eating food and playing Dragon Age and Final Fantasy XIV.
Overnight Oats: the perfect breakfast for busy mornings
Kayla Francis (Tokyo)
Photos: Kayla Francis
I hate waking up in the morning. I’ve found that I always end up rushing because I decided to take that ‘10 minute’ lie-in which then ends up ruining the rest of my day. I end up starting my day flustered in the office chowing down on an onigiri that’s doing nothing for me. Preparing a breakfast that is yummy and easy has been a complete game-changer for me. When I know I have a busy week coming up, overnight oats are my go-to. Cheap, versatile and filling, this recipe will be sure to start your day off well.
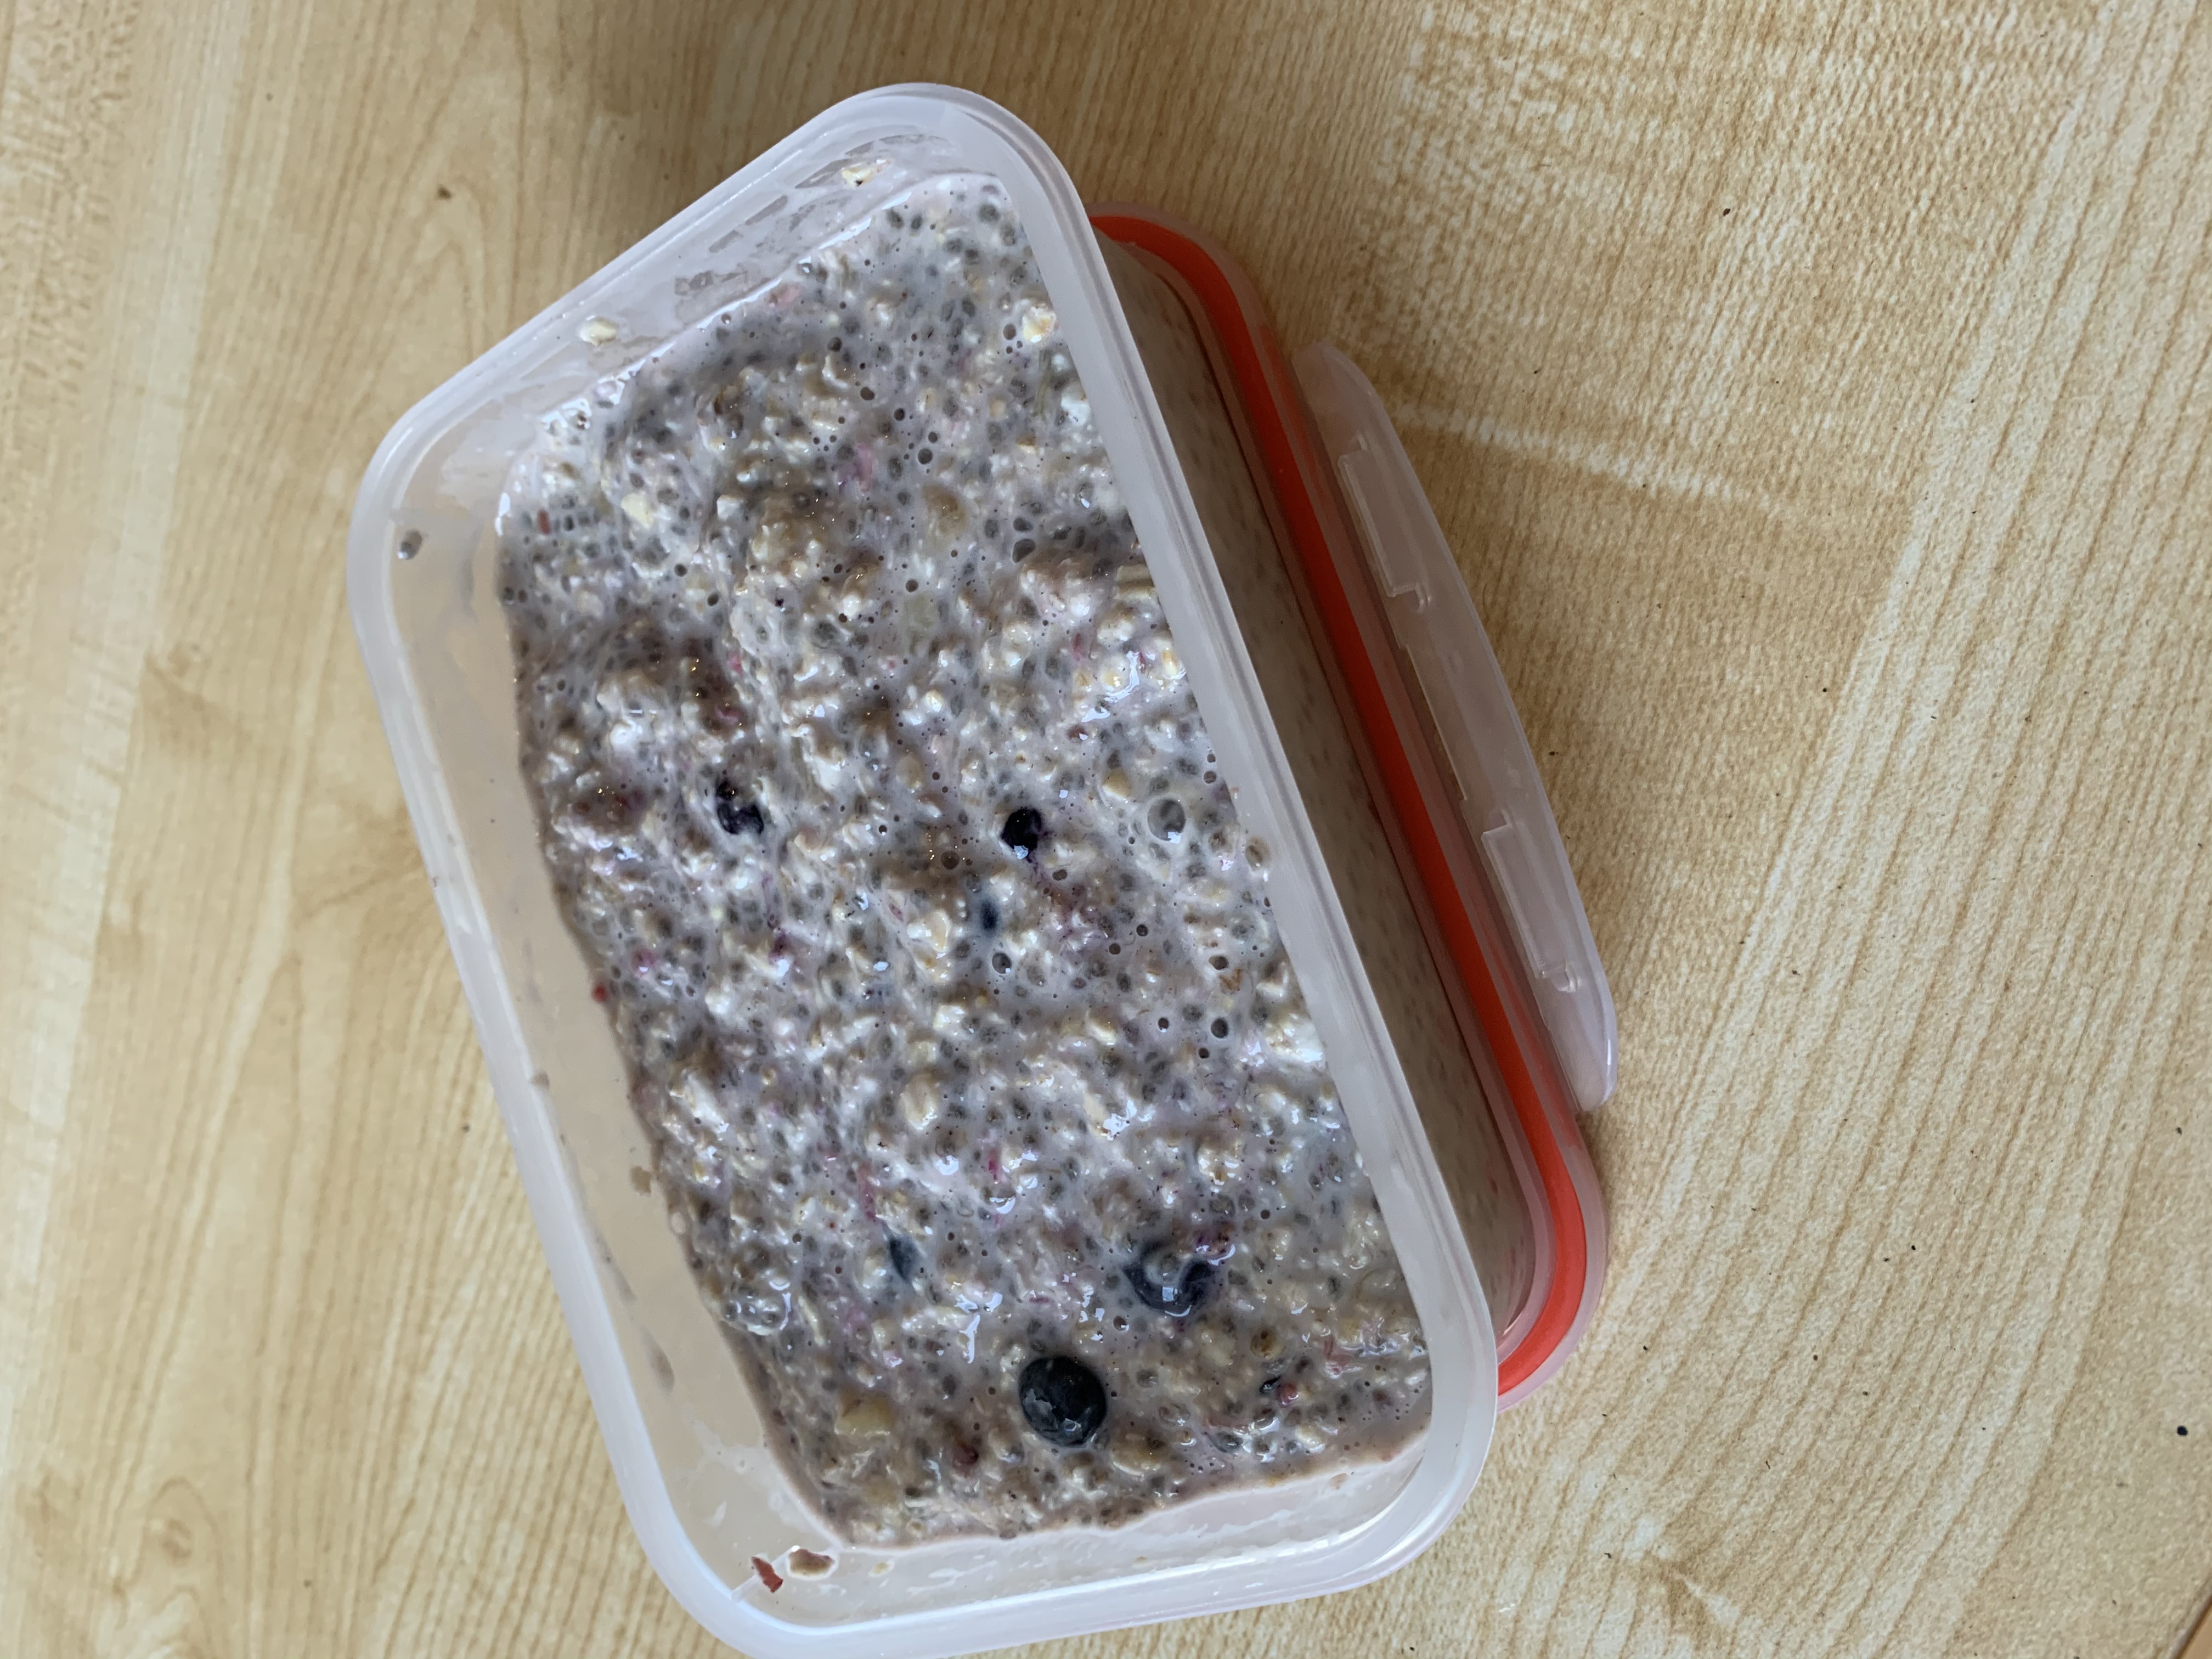

Basic Overnight Oats
Makes 1 serving but multiply for meal-prep
Ingredients
Oats 75 g
Pinch of salt
Maple syrup 1 tsp (optional)
Chia seeds 1 tbsp (optional)
Milk of your choice (I use almond) 250 ml
Method
Mix all ingredients into your container of choice the night before and store in the fridge. Add a splash of milk so it’s the right consistency for you and enjoy.
But wait! Plain oats can be pretty boring, read on for my favourite toppings.
Carrot Cake Overnight Oats
Ingredients
Basic overnight oats mix (above)
Half a carrot grated
1 tsp ground cinnamon
1 tsp allspice
2 tbsp raisins
Walnuts (I use 4) roughly chopped
Method
Mix all ingredients except for the walnuts into your container of choice. Store in the fridge overnight. Add a splash of milk and top with walnuts before serving. They will survive your commute if you wish to eat at work.
Peanut Butter and ‘Jelly’ Overnight Oats
Ingredients
Basic overnight oats mix (above)
Peanut butter 1tbsp
Frozen mixed berries 50g
One banana mashed
Method
Mix all ingredients into a container of your choice and store in the fridge overnight before eating.
Don’t be afraid to have fun with overnight oats. Not only can you experiment with whatever flavours you like but also textures by adding chia seeds, nuts and more/less milk and oats.
Chicken and Kimchi Rice Bowls
Kayla Francis (Tokyo)
Photos: Kayla Francis
Living in Tokyo means that there are a lot of amazing restaurants to visit and I am ashamed to admit how much I eat out. When I do finally get round to cooking, I try to eat something with lots of vegetables in a foolish attempt to balance out my diet. This is the perfect mid-week meal prep for when you want something quick and filling but can’t be bothered to cook. It’s also incredibly versatile, and you can swap the meat and veg for anything you like. I like cooking with kimchi as it already has a lot of seasoning and therefore does all the hard work for me.
Serves 5

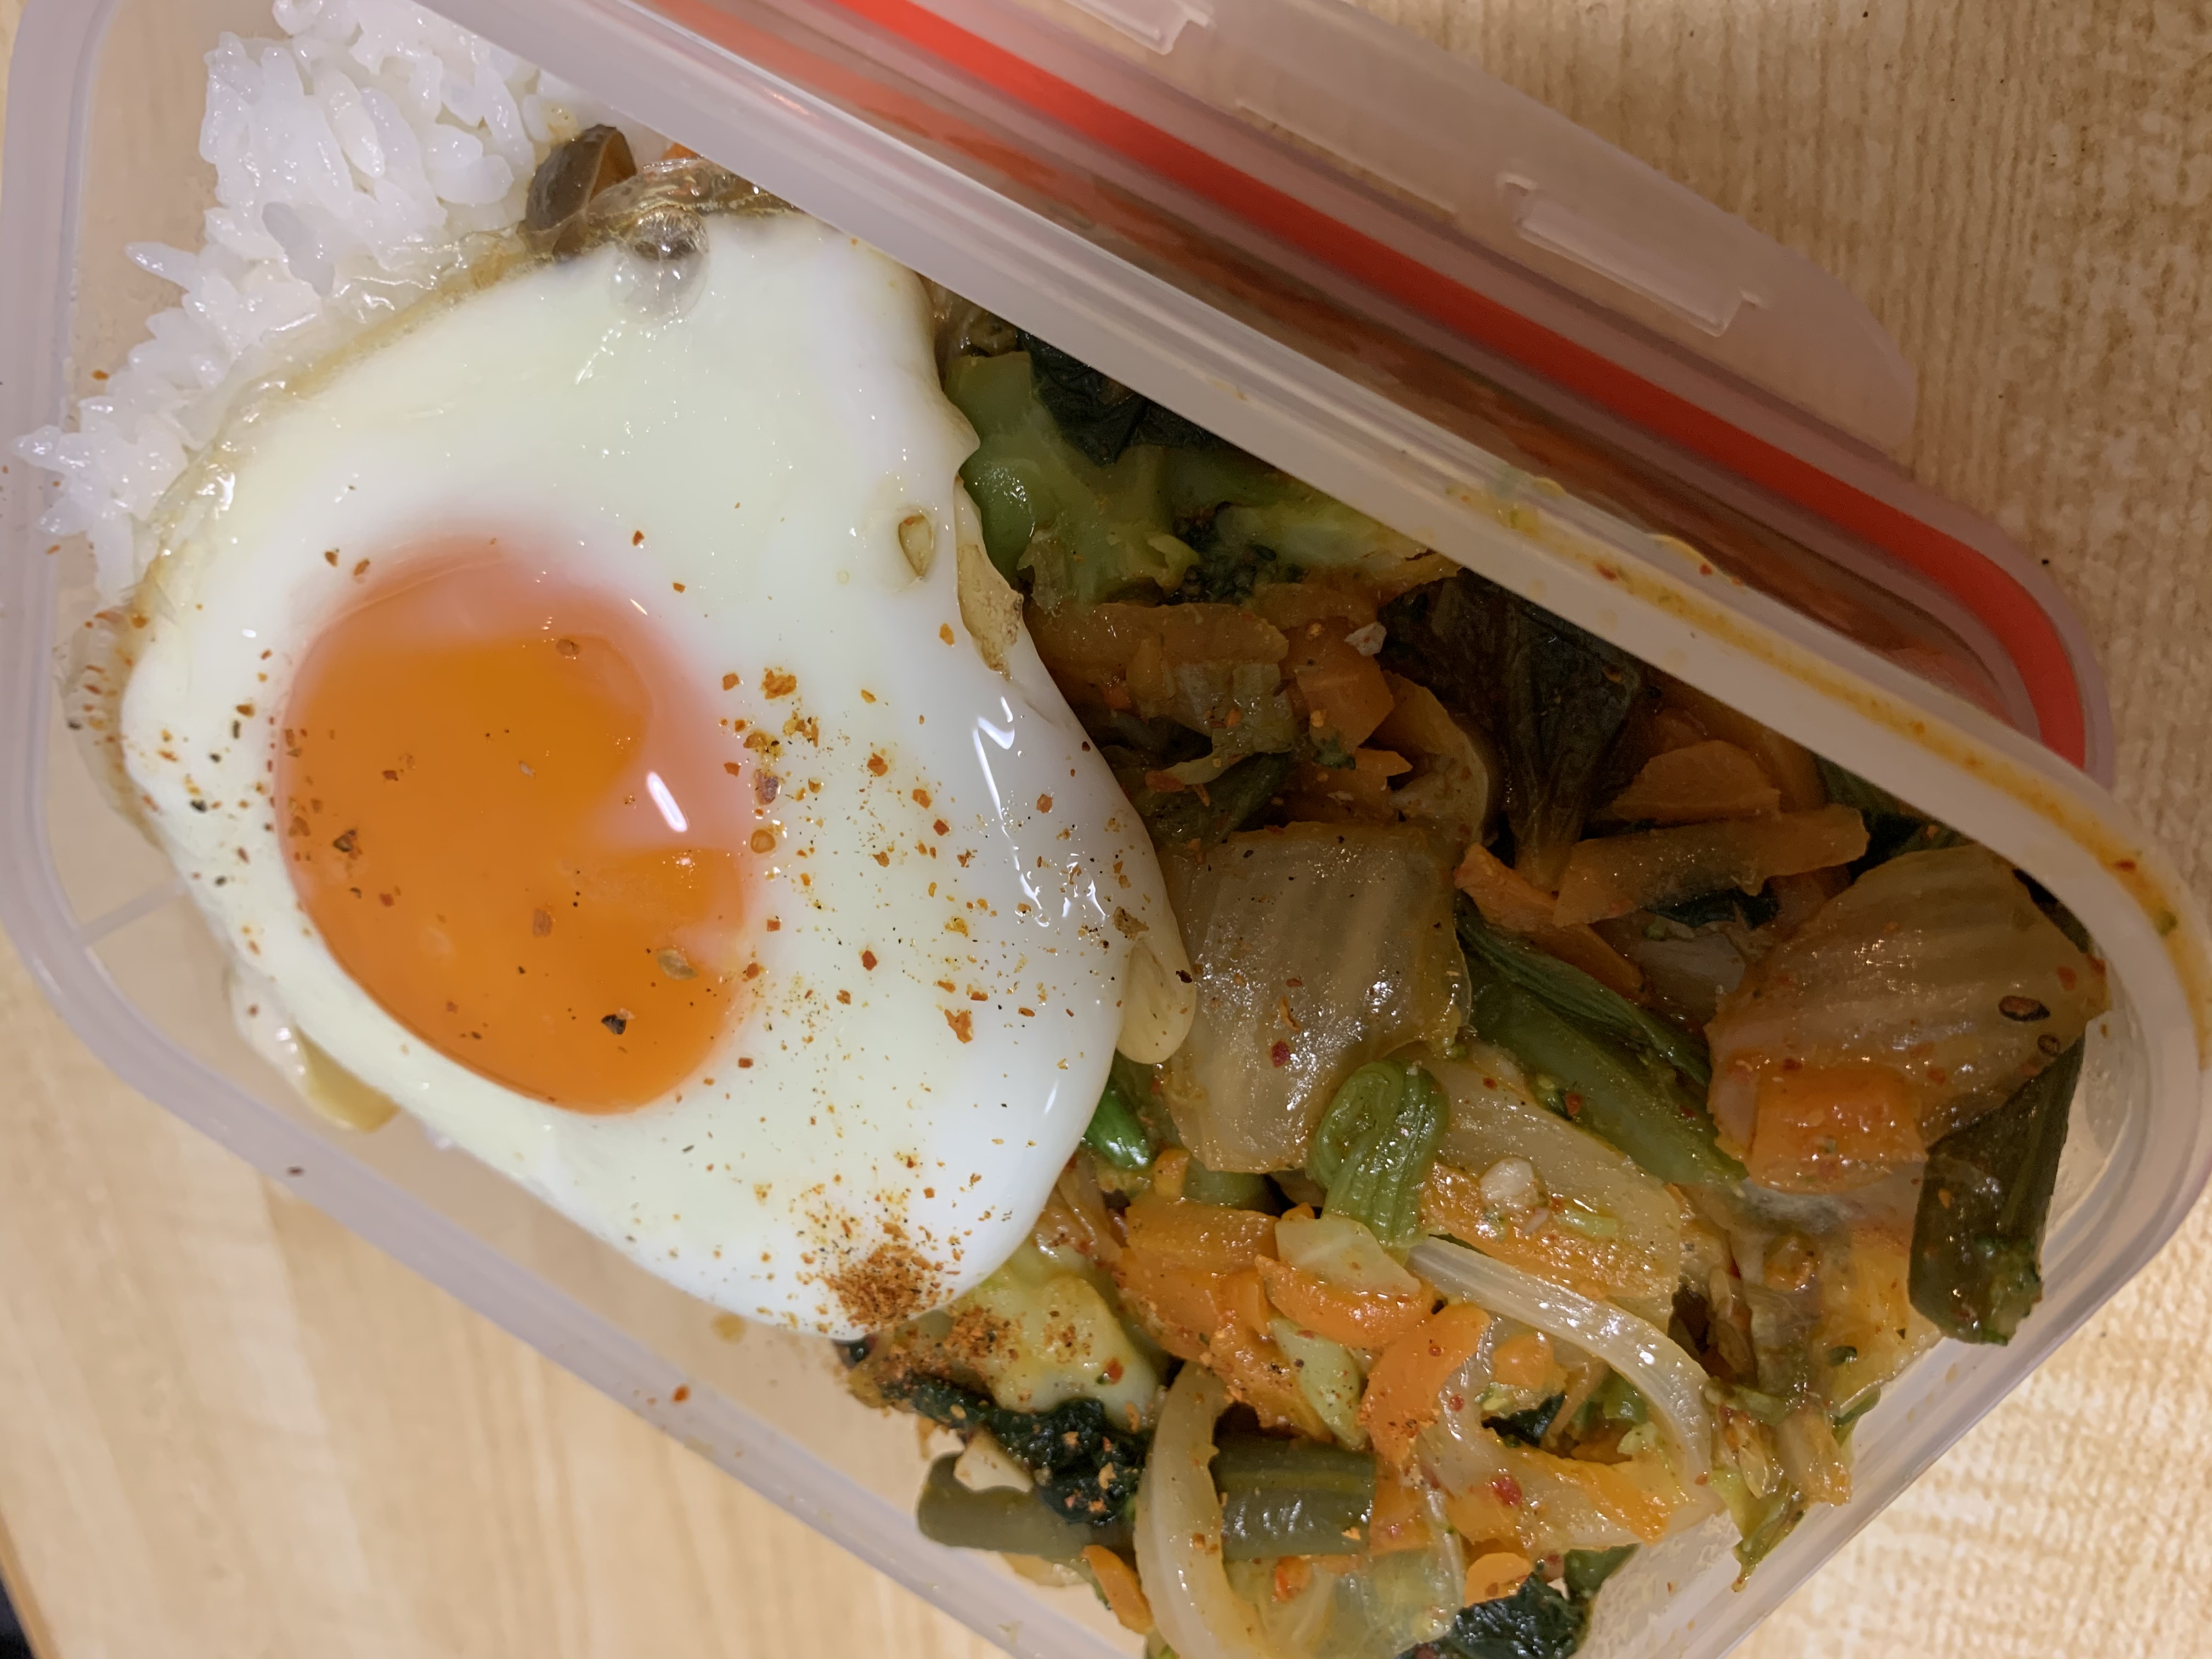
Ingredients
Rice (I cook two cups)
500g of chicken cut into bite-size pieces
330g tub of kimchi
200g frozen Broccoli
200g frozen green beans
200g frozen spinach
2 carrots, grated
100g mushrooms, roughly chopped
5 eggs
Chilli flakes (optional)
Any veggies you have leftover in the fridge!
Method
1) Wash and cook the rice according to your rice cooker/instructions on the
pack. Boil your broccoli and green beans in salted water until tender (around
five minutes). Drain and leave to the side.
2) In a separate pan heat oil over medium heat and fry the chicken until no longer
pink.
3) Once the chicken is golden, add the mushrooms, grated carrots (I normally just
grate them straight into the pan), spinach and any leftover veggies you might
have (I added some leftover cabbage). Cook for roughly three minutes until the
veg begins to soften.
4) Add the green beans, broccoli and a splash of soy sauce (I’m currently loving
an oyster infused one). Add the kimchi and fold the ingredients together, be
careful not to stir too much if you don’t want the veggies to soften too much.
Add chilli flakes.
5) Fry five eggs (my trick with eggs is always to cook over low heat). Separate
the rice into four containers and a plate (I normally eat one portion now and
save the rest for dinner/lunch). Divide the chicken and vegetable mix. Top with
the fried eggs, add extra chilli flakes if you want (this recipe is also great with
sriracha) and enjoy!
Kayla is a second year Tokyo JET from London, UK. When she’s not working she can be found eating her way through Tokyo, trying out new classes, reading and cooking. She keeps track of all her cooking on Instagram: @kayla64a and has a blog.
The Trials of a Tiny Fridge
Got a tiny fridge? A freezer that’s basically a shelf? Don’t give up! Here’s five tips to spare you a last-minute trip to the combini.
- You may not realise this, but a lot of fruit and veg doesn’t have to be stored in the fridge. According to the Farmer’s Almanac, tomatoes, potatoes, garlic, peaches, apples, pears, bananas and many more should be left out of the fridge. (Although, pay close attention to your food if it reaches over 30 degrees in your kitchen.)
- Divide up your portions (basically start meal prepping) as soon as you get home with your shopping. If you divide up your veg and meat from the beginning, it will take up less space.
- Buy ingredients that will stretch over two or more recipes that week. For example, since I only cook for myself, I buy a bag of carrots and use it in both bolognese and curry.
- Four is the magic number. Your cooked meals will still be safe and tasty for four days in the fridge, so you can spare your freezer space until then.
- Embrace the tiny fridge life! You may have to food shop more often, but overall you’ll probably buy less unnecessary things—you’ll save money and reduce food waste! Say goodbye to forgotten fruit in the back of the fridge, or the yoghurt you didn’t touch. Also, frozen meals aren’t exactly the healthiest, so you’ll be forced to eat fresher food.
Clare is a second-year JET in the inaka of Fukushima, but she’s originally from England. When not editing CONNECT’s Wellness section, she spends her days reading fantasy books, writing stories, and hiking up random mountains. You can follow her travels here.


