

![CONNECT ART ISSUE 2024 SUBMISSIONS [CLOSED]](https://connect.ajet.net/wp-content/uploads/2024/04/ARTISSUE-INSTA-600x500.png)
Delectable Daikon
Kimberly Fitzgerald (Wellness Editor)
This article originally featured in the December 2021 issue of Connect.
One of the many benefits of living in the Japanese countryside is that friends, neighbors, and coworkers tend to display their kindness and generosity with food—often straight from their own gardens. This happens so regularly that I have developed a system of storing some reciprocal gifts, otherwise known as “okaeshi,” in my apartment to show my appreciation for their generosity. This okaeshi stockpile came in handy a few weeks ago, as one of my neighbors recently gave me a bag, bursting at the seams, of what looked to be massive, pale carrots.
As you may have suspected, these were not actually carrots, but rather white Japanese radishes, better known as “daikon”. And I was now the proud owner of more daikon than I knew what to do with.
Daikon is a common staple in Japanese cuisine. Pickled daikon is a popular side dish in restaurants all across Japan, but it is also eaten raw, boiled, steamed, and fried.
Though the flavors of a daikon can vary greatly depending on the variety, raw daikon has a sweet and slightly sharp flavor, milder than a red radish. When cooked, daikon tastes mellow and becomes tender, absorbing the juices of whatever it is cooked with. Daikon greens are very peppery with a strong flavor, but also mellow when cooked.
Valued for its nutrition, it is used not only in Japanese cuisine, but also in Chinese, Korean, and many Southeast Asian cuisines. The vegetable is so versatile that a simple Google search for “daikon recipes” yields over 2,800,000 results, ranging from the traditional simmered daikon to “daikon french fries.”
In Japan, aside from pickled daikon, you’ve also most likely eaten daikon oroshi, or raw, grated daikon. As daikon oroshi is similar to horseradish, but less pungent, it is a good addition to tempura and soba sauces.
Daikon oroshi has been eaten in Japan since the Edo Period (1603-1868) not only as a delectable side dish, but also to aid in digestion. There are many excellent sources of digestive enzymes in daikon, such as diastase, amylase, and esterase. These enzymes become much easier to absorb when daikon is grated. (1)
In fact, daikon is great for your digestive tract in general as it is also low in digestible carbohydrates, high in fiber, and contains a large water content. (2) Which basically means it helps to keep you regular and your digestive system squeaky clean. Daikon has also been proven to inhibit infections of the kidneys and urinary system. (2)
So, though my stockpile of okaeshi is significantly depleted, I have a stockpile of daikon that is sure to keep my stomach healthy, happy, and full this winter. If you also have more daikon than you know what to do with or are looking for some traditional, seasonal recipes, then I hope you will continue reading for this month’s recipe—Furofuki Daikon—a true Japanese classic.
References:
- https://bit.ly/3F1qZTR
- https://bit.ly/3C3XLSn
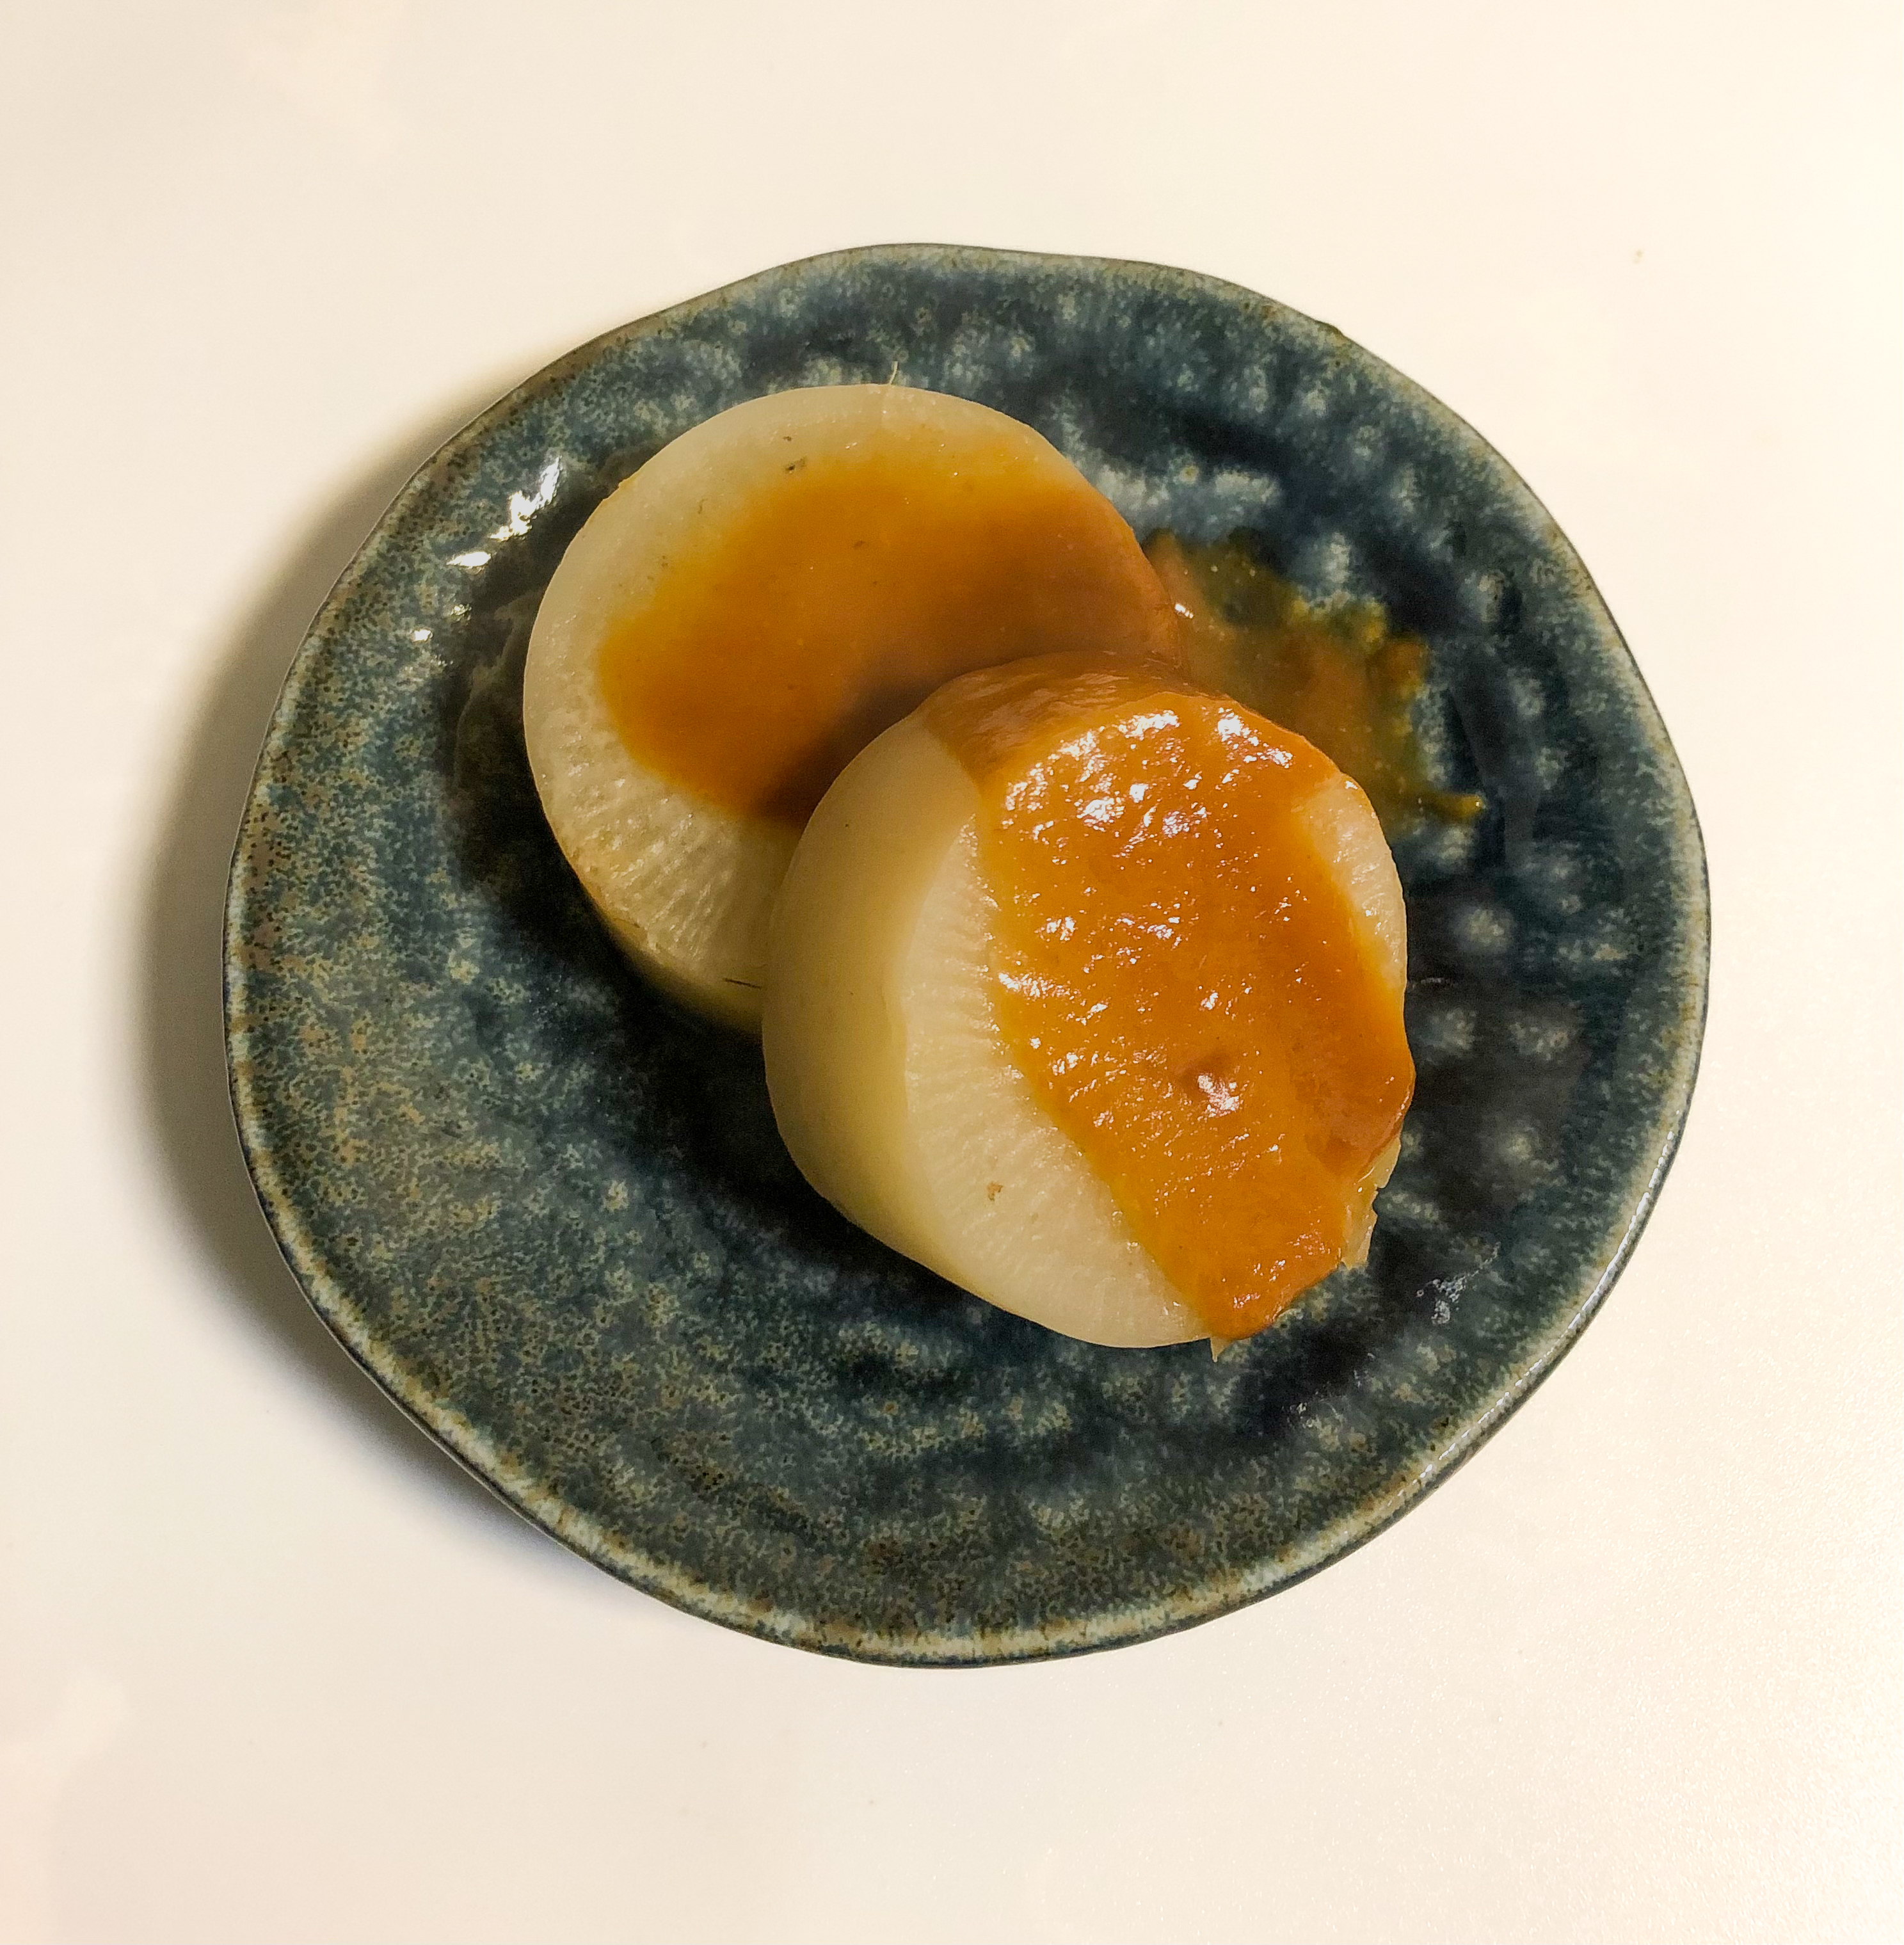
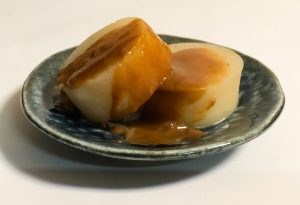
Furofuki Daikon
Piping Hot Radish with Miso Sauce
Elizabeth Andoh (Tokyo)
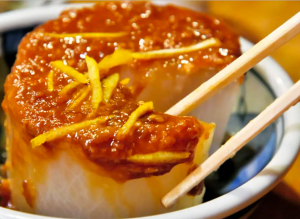
Furofuki, literally “blowing steam,” is the name given to vegetables—most often, daikon radish—that have been tender-prepped and then simmered in (kelp) broth. Served piping hot, so hot you will need to blow away the steam (that’s the origin of the dish’s name), it is a perfect wintertime fare. Serve it in the broth in which it was cooked (I like to garnish it with strips of fragrant yuzu peel) or sauced with miso, light or dark . . . or a bit of both.
The flavored miso sauces used to finish the steamed radish in this recipe are basic building blocks in the Japanese kitchen. The sauces can be used as a dip for sliced fruit (try crisp apples) or slathered on blocks of tofu and finished under the broiler (a dish the Japanese call dengaku).
This recipe makes about 4 to 6 servings.
Ingredients:
- 4 to 6, one-inch thick circles daikon (each about 2 ounces)
- 2 cups komé togi-jiru, (starchy, cloudy water from washing rice)
- 1 cup kombu-jiru (soak kelp in water for at least 20 minutes and up to several hours)
- 2 teaspoons susukuchi shoyu (light-colored soy sauce)
- 2 teaspoons mirin (syrupy wine)
- 1/4 teaspoon cornstarch (mixed with a few drops cold water)
- 1/4 teaspoon zest or peel from fresh yuzu or lemon
- 1/3 cup Lemony Miso Sauce and/or 1/3 cup Pungent Red Miso Sauce (recipes below)
Directions:
- Peel the circles of radish, preferably by cutting off a thin continuous sheet. Then slice into one-inch thick circles and bevel the edges of each circle of radish to keep it from crumbling as it simmers later in broth. You can use a vegetable peeler or a knife to do this.
- Place the starchy rice-washing liquid (kome togi-jiru) in a deep pot just wide enough to hold the daikon pieces in a single layer.
- Slowly bring the liquid to a boil over medium heat. Large clouds of froth will form and rise in the pot (which is why you want to use a deep pot); adjust the heat to keep it from overflowing. Using a dropped lid helps keep the daikon submerged throughout the tender-prepping (also known as par-boiling) process.
- Cook until the daikon is tender (a toothpick or bamboo skewer meets little resistance), about 10 minutes. Drain; rinse away scum. Daikon tender-prepped in starchy water will have a luminous appearance.
- Place the tender-prepped daikon in a saucepan filled with kelp stock, seasoned with usukuchi shoyu (light-colored soy) and mirin. Simmer the daikon until very soft and tender (a toothpick will meet with no resistance), about eight to nine minutes.
- While the daikon is simmering, prepare one OR both miso sauces, each in a separate, small saucepan.
The technique for tender-prepping in starchy rice water is a useful one to remember whenever you are cooking daikon, carrots or other firm root vegetables or tubers. Tender-prepping makes the vegetables very soft without falling apart (the natural oils in the rice water help them hold their shape). Tender-prepping also makes them porous, getting them ready to absorb the flavor of the broth in which the final cooking takes place. When you wash rice, save the starchy water in a jar—storing it in the refrigerator if you do not use it the same day. After several hours you will notice a sediment forming in the bottom of the jar. When ready to use, stir it to recombine.
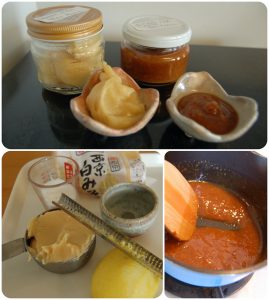
Lemony Miso Sauce
(Makes about 1/3 cup)
Ingredients:
- 1/3 cup Saikyo shiro miso (sweet, light bean paste)
- 1 and 1/2 tablespoons saké
- 1 teaspoon sugar (+ 1/2 teaspoon, optional)
- 1 tablespoon water
- 1 teaspoon finely-grated lemon zest
Directions:
- Combine the sweet miso with the saké and one teaspoon of sugar in a small, sturdy saucepan. Before placing the pan over heat, stir ingredients with a wooden paddle or spatula until the ingredients are thoroughly mixed.
- Stir in the water until combined.
- Using a spice grater or fine-tooth microplane, scrape the skin of a fresh lemon to produce fine zest. Add half of this zest to the pan, reserving the other half for later.
- Cook the sauce over medium heat, stirring constantly to prevent scorching. The sauce will bubble and splatter a bit, so use caution and a long-handled wooden spoon or spatula.
- Cook until the mixture is glossy and the consistency of ketchup (when you stir, you should be able to see the bottom of the pan), about five to eight minutes. The sauce will stiffen and thicken a bit as it cools, so err to the side of thin (but not runny).
- Use a spoon to take a small sample from the pot. Allow the sample to cool before tasting.
- Adjust, as needed, with a pinch more sugar (if too salty) and/or water (if too stiff).
- Add the remaining zest and stir to blend.
- Set aside to cool completely.
- Transfer the cooked and cooled sauce to a glass jar with a tight-fitting lid. Refrigerated, it will keep for three to four weeks.
Pungent Red Miso Sauce
(Makes about 1/2 cup)
Ingredients:
- 5 to 6 tablespoons Sendai miso (pungent “aka” miso, or “red” miso)
- 2 to 3 tablespoons sugar
- 2 to 3 tablespoons saké
- 1 to 2 tablespoons water
Directions:
- Combine the ingredients directly in the pan in which the sauce will be made, ideally fairly deep (the sauce will splatter as it cooks). Before placing the pan over your source of heat, stir ingredients with a long-handled wooden spatula until they are thoroughly mixed.
- Cook, stirring constantly, over medium-high heat until the mixture is glossy and the consistency of ketchup, about five to eight minutes. The sauce will stiffen and thicken a bit as it cools. The sauce will bubble and splatter a bit as you cook, so use caution.
- Use a spoon to take a small sample from the pot. Allow the sample to cool before tasting.
- Adjust, as needed, by adding more sugar (if too salty) and/or water (if too stiff).
- Set aside to cool completely.
- Transfer the cooked and cooled sauce to a glass jar with a tight-fitting lid. Refrigerated, it will keep for three to four weeks.
Born, raised, and educated in America, Elizabeth Andoh has made Japan her home for more than half a century. She is the author of many books including Washoku: Recipes from the Japanese Home Kitchen (Ten Speed Press, 2005), winner of the Jane Grigson award for academic excellence in food writing.
Elizabeth directs “A Taste of Culture,” a Tokyo-based culinary arts program. Her website www.TASTEofCULTURE.com is a resource for recipes and information about Japan’s food culture. Links for her Facebook page and Kitchen Culture Cooking Club (FB group), Kitchen Culture (blog), podcasts (NPR Japan Eats), and newsletter can be found on her site.


